

VoyagAR App Update
Project Description
At Apex, we were always pushing the envelope with our technology and simultaneously looking to make our presentations more interactive and immersive. When Apple released ARKit in 2017, we knew this was going to play an instrumental role in the way we educated homeowners in the future. So, we started quickly putting together plans and making prototype builds for what would eventually become “VoyagAR” (a major release to our A Better Way presentation). To my knowledge we were the first in the industry to release (and fully implement) an augmented reality application and I’m certain that we were doing things that no one else was doing to push towards the ultimate AR experience.
Work Performed
- Conceptual Design
- UI/UX Design (Augmented Reality)
- Graphic Design
- Branding
- Implementation Specialist
Client
Apex Energy Group (Employee)


Our Objective
To revolutionize the customer experience through engagement using AR interactivity to make the unknown, known and to make the invisible, visible.
User Interface Design
The UI/UX for this project was unlike any other I had worked on in the past. For starters, there were many complexities in navigating the various sections, controlling the unique window options, and interacting with certain view controls and on-screen animations. And, all of this had to be done (and done harmoniously) with a full-screen camera feed in the background. Another factor to consider, was that unlike other sections of our iPad presentation, this module would be done holding the iPad in portrait-mode orientation which changes the grip the user has and makes one-hand use very difficult. So, to combat this, I focused on putting many of the controls within reach of the user’s thumb so that they can keep both hands firmly placed on the iPad at all times. Some, lesser used functions were placed in the top corners and could be used with a quick tap of the pointer finger as needed.


The Transparency Challenge

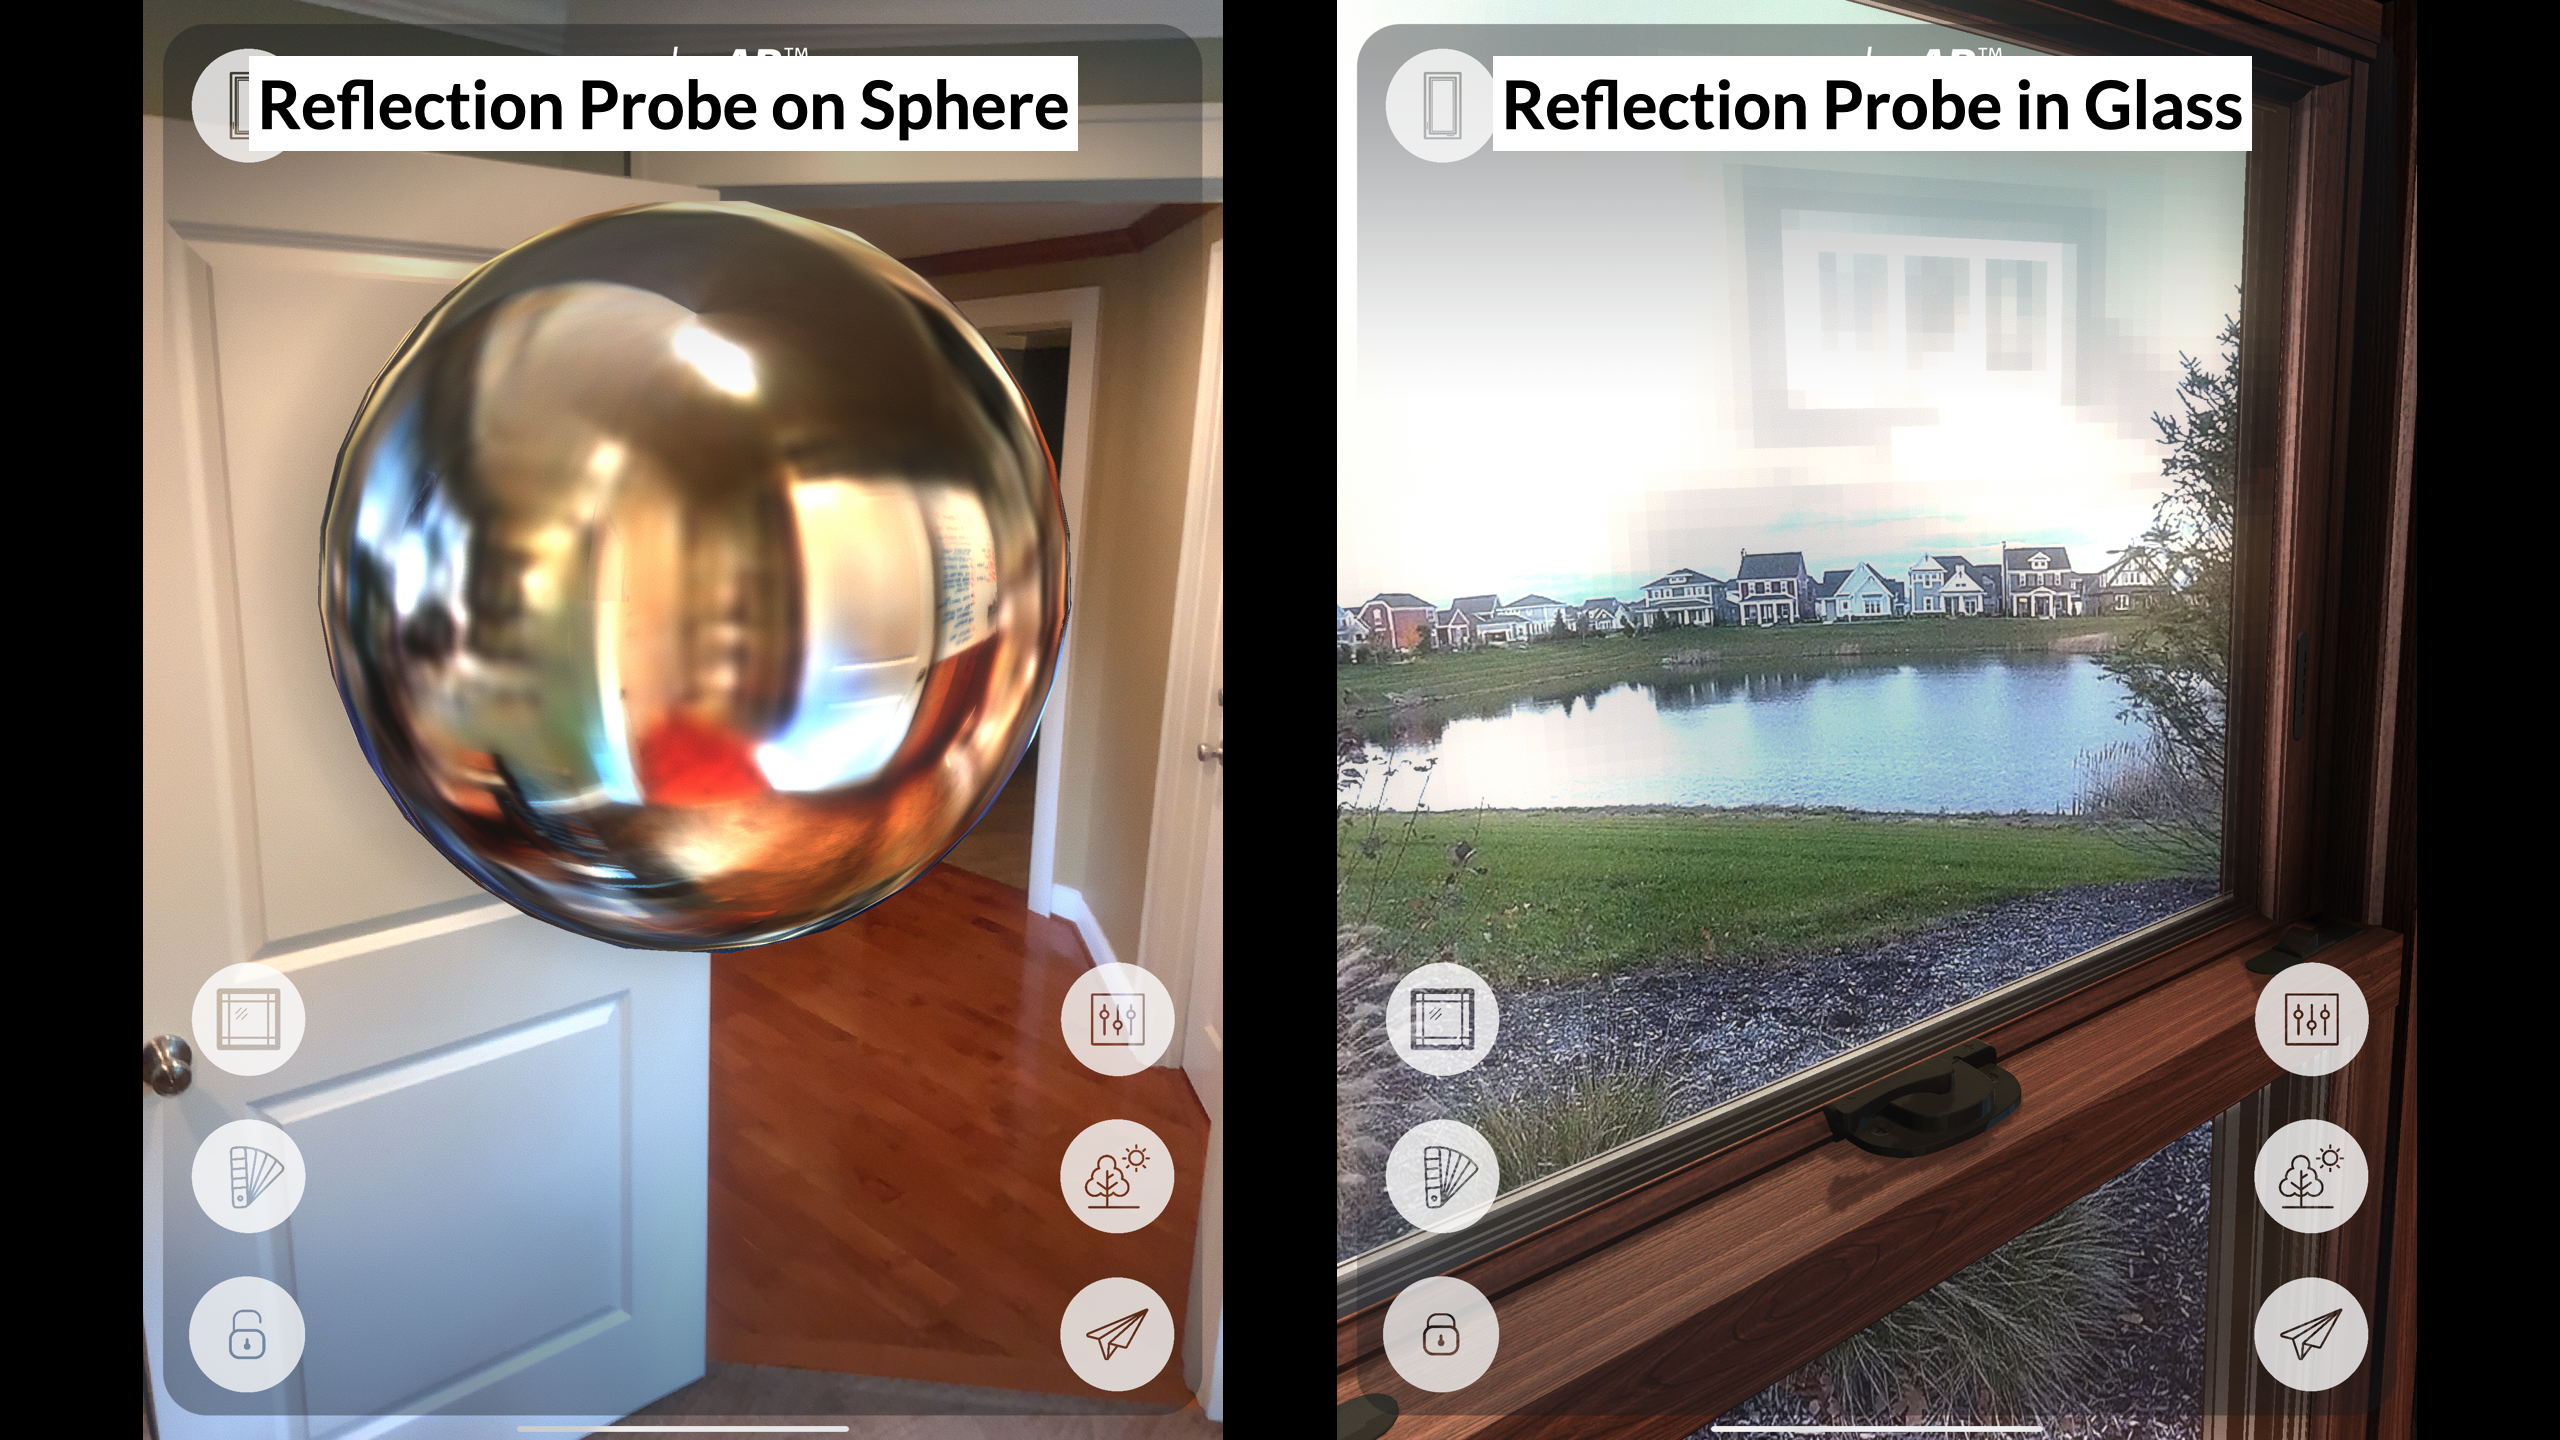
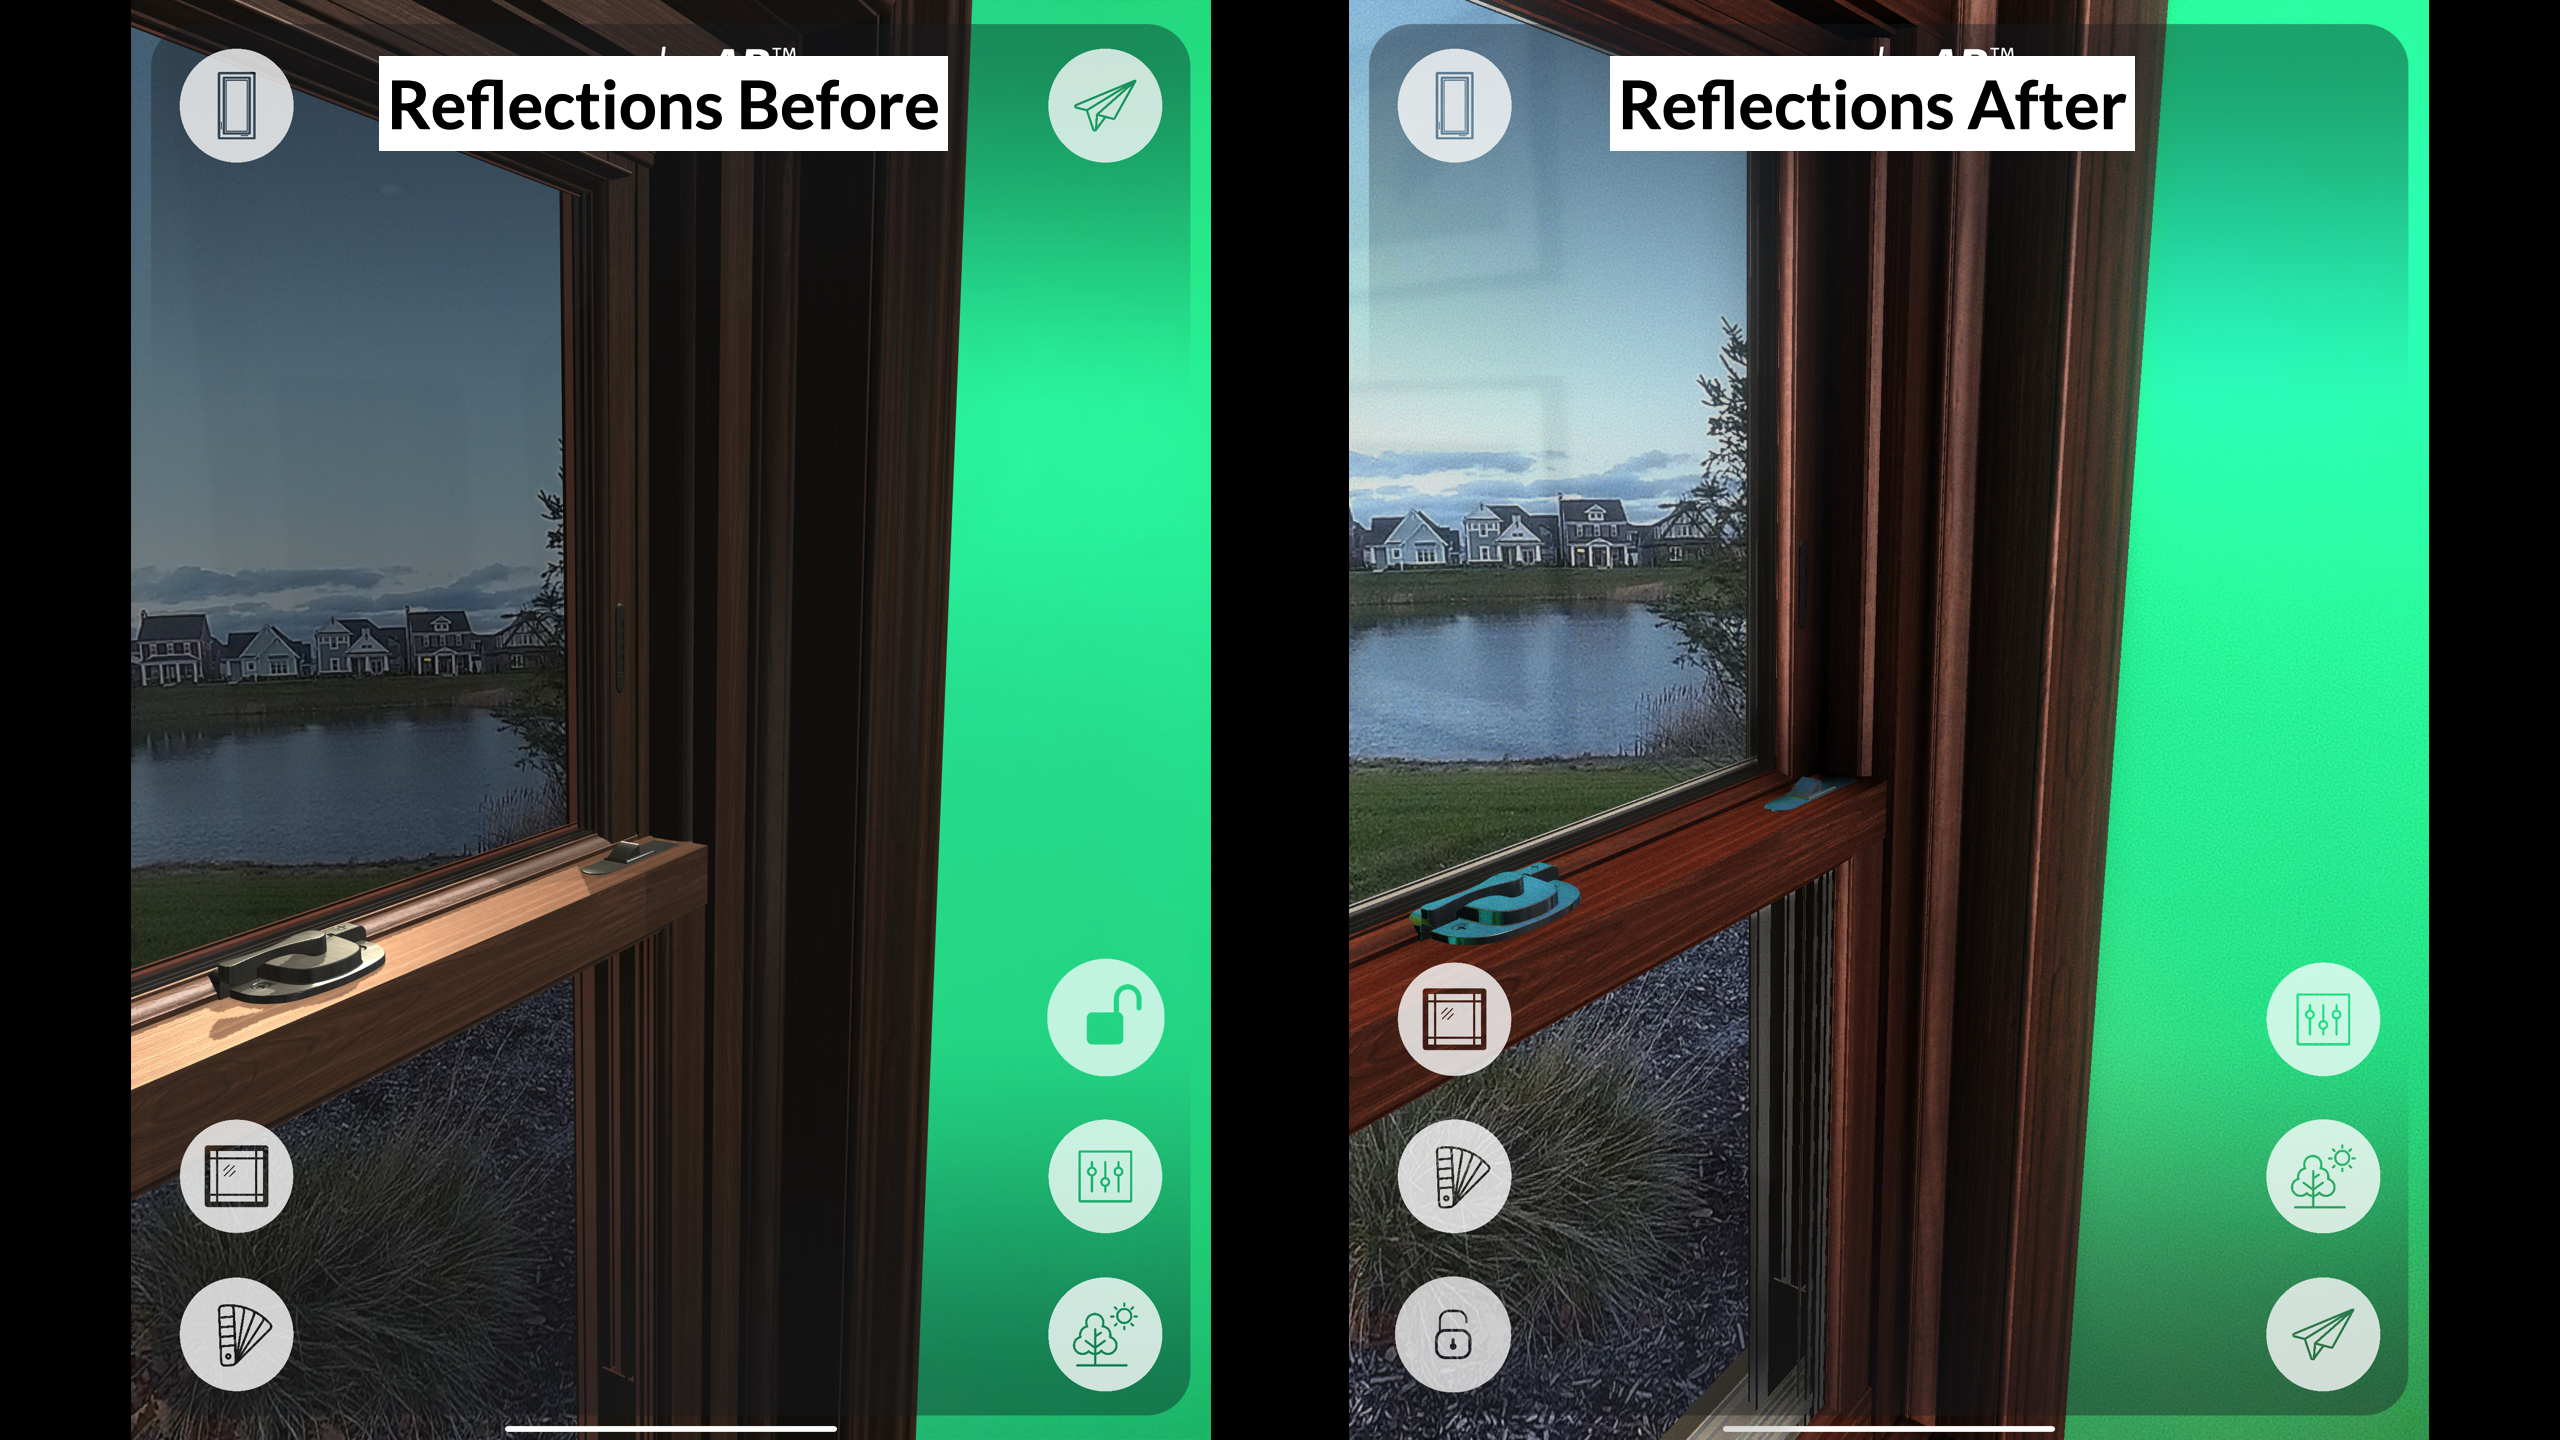
Reflection Probe
Another challenge with placing glass into a scene is that it reflects the environment around it. So, to help sell this effect, we implemented a reflection probe shader on various surfaces. Along with this we also utilized ambient lighting in the reflections as well. This really helps when you have a strong cool or warm light in the room you’re working in by blending it into the 3D objects you’ve placed in the scene. You can see this illustrated nicely in these two examples.

Woodgrain Matching
Another challenge was ensuring our woodgrain shaders were an exact match to the actual material used on the product. To start we took massive sheets of the material used by the manufacturer and pasted them onto fiber board and had them scanned on a large flatbed scanner. We created our shaders out of these scans, but quickly realized that they weren’t being represented accurately in the AR scene. There were many factors causing the discrepancy, from the lighting used in the scene, to the ambient lighting in the room, to the difference between how light was reflecting off the actual vinyl material used by the manufacturer and how it was being represented digitally. So, to perfect this, we put the large sheets side by side with the 3D model and took screenshots. I then took these and the shader materials into Photoshop and did some color correction to them depending on what color values were needed (more red, more yellow, etc.). The outcome was a perfect match.
Film Grain
We implemented an old compositing trick to the scene as well. We noticed that the 3D models were too crisp and clean, while the camera feed always had a bit of noise. This is due to the small image sensor on the iPad camera and how poorly it handles lower lighting conditions (which is nearly every indoor scenario). So, to blend the two we added some film grain over top of the entire scene that really makes the 3D model look more like it is coming in from the camera feed.


Bloom Effect
Another trick we implemented was the addition of a bloom, a post-processing effect used to reproduce an artifact found in real-world cameras. This effect creates fringes of light that extend from the edges bright areas in an image, simulating the illusion of an extremely bright light. This is a small detail that really goes along way given that most often times, the outside light coming in a window is much brighter than the interior scene. This effect is not found in the night scenes.
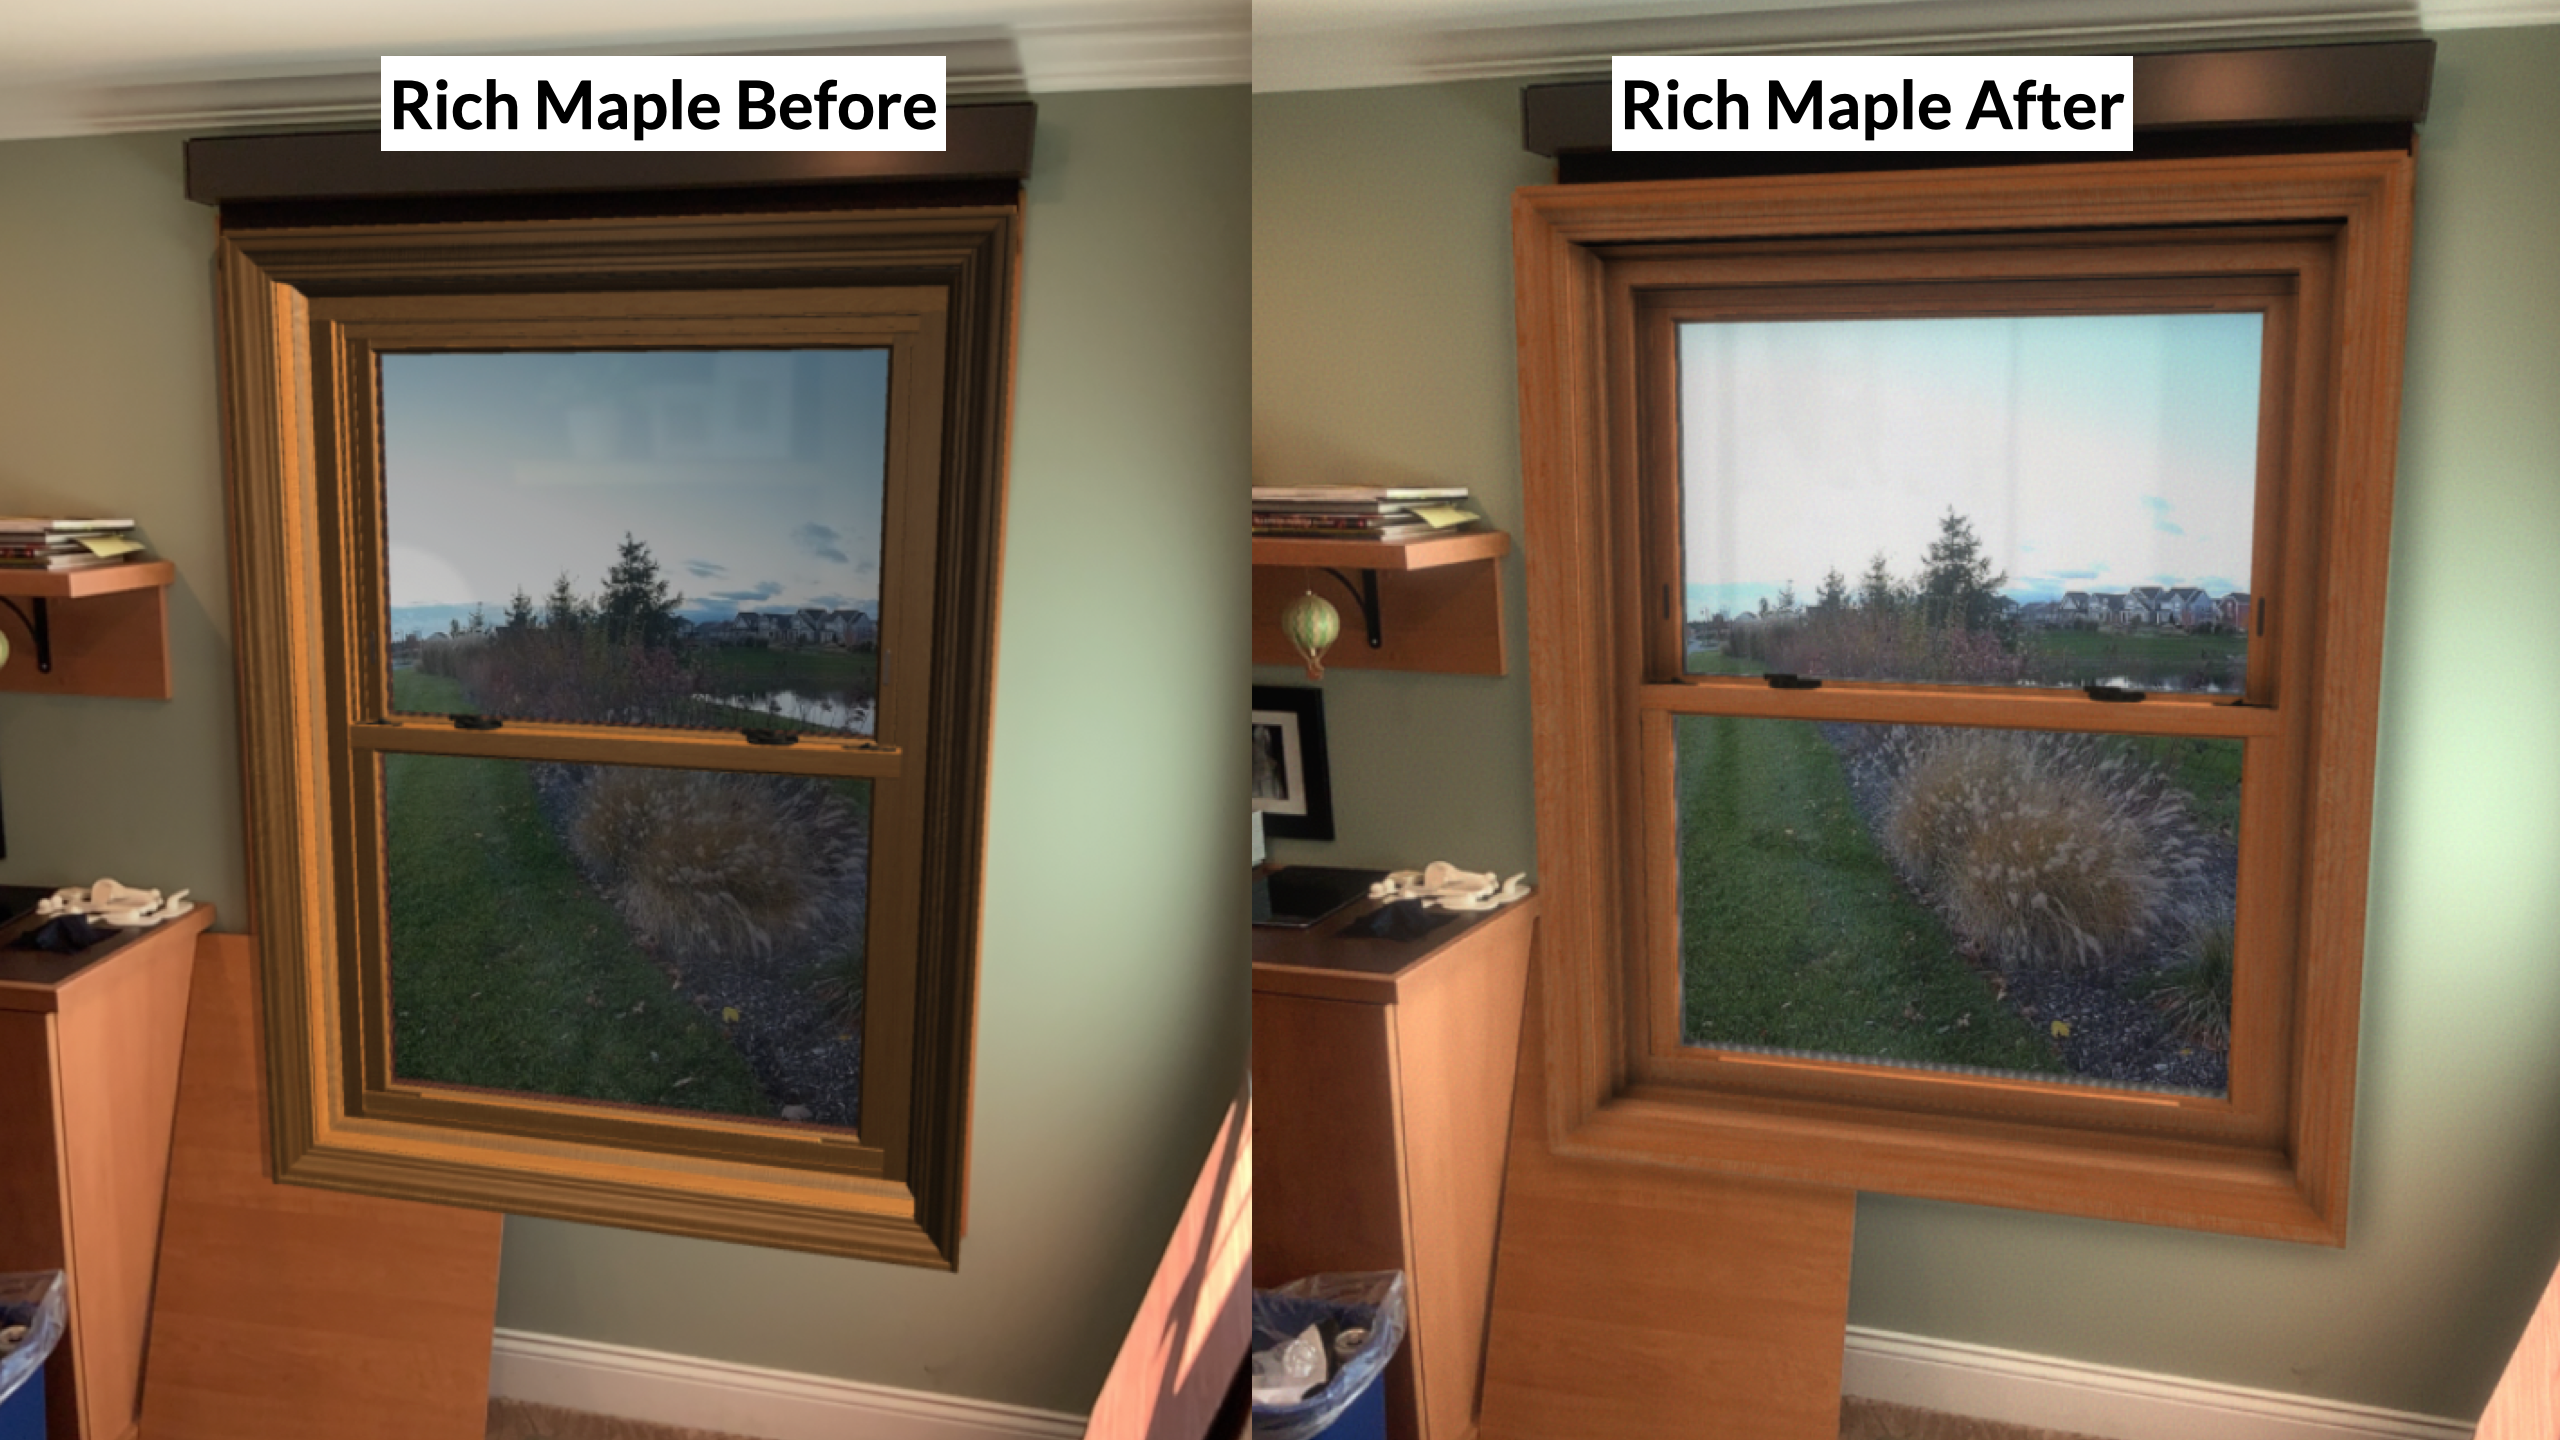
Ambient Occlusion
The effect that had the single greatest impact on creating the photo-realism of our 3D model was the incorporation of ambient occlusion. Think of ambient occlusion as a self-shadow that is created as two objects near each other. This can be illustrated by pushing your thumb and pointer finger together. As they near each other the shadow intensifies as less surface area is exposed to the ambient light around it. You can really see the difference in the side-by-side example.

Explosion View Concept
The third section of the VoyagAR application was called “Explode” and allowed the user to expand a 3D model of Apex’s product and interact with some of the parts under the hood. This was still a work in progress when I left, but I helped develop some of the concepts, completed all the user-interface design, and did all the SFX work. It was not released due to some tracking and stability issues due to the limitations of the object detection function of ARKit. We were working around this by using some image targets to detect placement, but the best-case user experience will be when the rep can just simply have the homeowner point the iPad at the sample during the demo and it will pull in the interactive elements.